
Preparation
The airframe has been assembled but I glued on the alternate windscreen to act as a mask. Tape has been used for the cockpit opening and also the engine insert and the resin cowling tacked into place.

I mentioned last time that there is a noticeable join between the spinner and the back plate. Using superglue mixed with talcum powder as a filler, this was sorted out.

I also hacked up the windscreen and canopy to simulate missing panes of perspex. The area was chain drilled and then scalpels and sanding sticks were used in order to tidy things up.

Undercoat
The model was the sprayed with Alclad Aluminium, this will act as an undercoat. For the hairspray technique to work a coat of matt varnish is needed otherwise the smooth finish will cause the subsequent paint layers to "wipe off". Once this matt coat has dried (I use a hair dryer to speed things up), a thin coat of AK Interactive Worn Effects thinned with water is misted on. It is important to thin this product with water as it's a bit too thick as it comes out of the bottle.

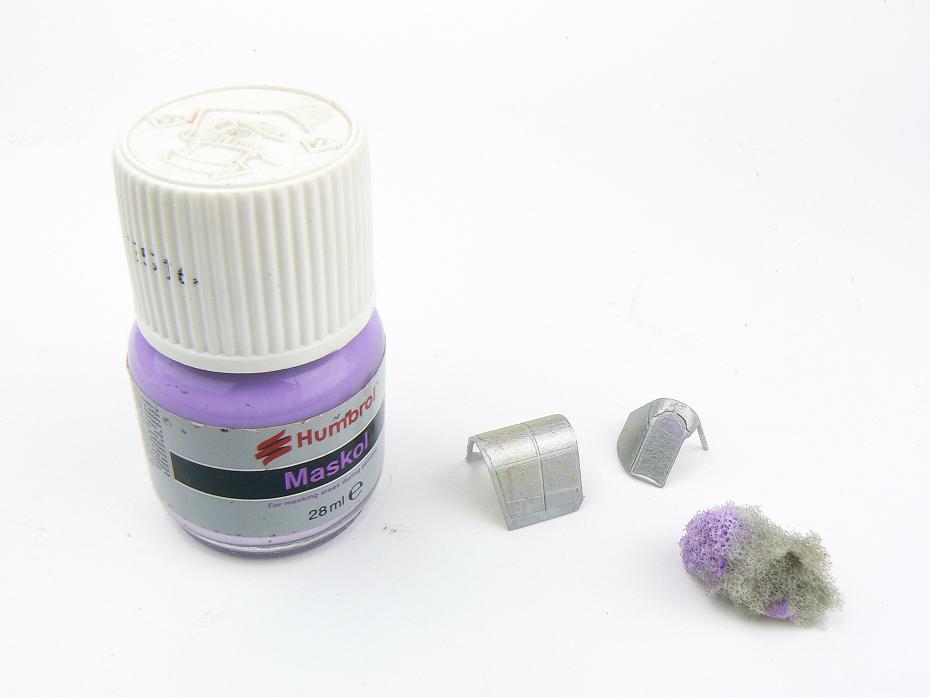
For delicate areas such as the canopy the hairspray technique won't work therefore we have to use something else. I find Humbrol Maskol to be an effective way of reproducing chipping in these sorts of areas, as long as it's applied by sponge that is. I find it works best if the excess Maskol is dabbed off otherwise you'll get blobs and this is not the effect we're after.

Painting the second coat
Now for the undercoat. Many P-40's serving with the RNZAF underwent repainting at some stages in their career, in many of the photos I have seen this first paint job is revealed underneath the peeling top coat so I decided to try and reproduce this.
The first layer is the Dark Earth. I lightened Gunze's colour and added some red and yellow as the colour pictures indicated a pinkish hue.

The next coat is more straight forward, Gunze's Dark Green.

Now for the fun part. The model is dampened with water and a damp brush is used to scrub away at the paint. The chipping fluid (or hairspray) will eventually dissolve and thus the dry top coat will break away and form chips. Don't panic if nothing happens for a few minutes, it will, just be patient.
As you can see, I kind of went a bit mental with this but it was intentional as we'll see in a moment.


Camouflage
This was sealed with more matt varnish and then another coat of the AK Interactive Worn Effects was misted on. When dry a coat of foliage green was applied using a mix of Gunze colours. This was faded as you can see in the photos, I used some Tamiya XF-4 Zinc Chromate first and then some Deck Tan. The Zinc Chromate will lighten the green but it will keep it's chromatic richness, the Deck Tan will bleach the green.


Once again the airframe is chipped using water and a cut down brush. You can see the effect of the undercoat, we have bare metal chips as well as chips revealing the undercoat. Again, this is sealed with matt varnish.


An that's where we are. I'm going to leave things for a few days as the markings will be sprayed next and when doing this technique quite often the masks and tape pull up the paint. A few days off will let things properly cure.
It just remains for me to wish everybody a very merry Christmas, I hope the big fat guy in the red suit brings you all the plastic, resin, photo etch and other stuff you wanted.
Cheers,
Jamie
Hi Jamie! This is looking great! :) I was a lot surprised when watching the first pictures of your chipping process, but then, the magic started! Really great job!
ReplyDeleteKeep going!
Merry Christmas!
Alex!