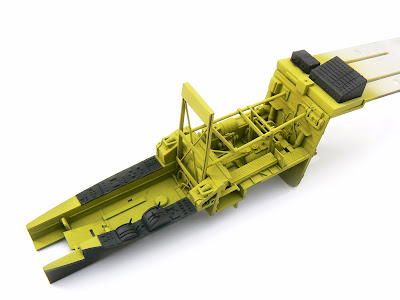
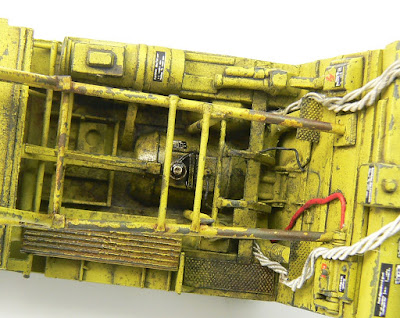
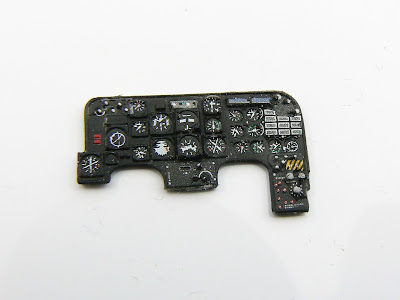
The cockpit was finally finished. To be honest I just let the imagination run away and I just kept adding more and more so in the end it looks really very busy. Its all plastic card, bits of that 1:48 F-14 and 1:35 WMIK, lead wire, brass wire and Albion Alloys tubing.
That row of black dots are HGW rivets, decals in fact! Note also the home made spring in the pilot's seat, inspired by the real thing but I think that's part of the comms. I did this because I think it looked cool!

To glue the brass rod, I squashed the ends to give a larger surface area for gluing.
The pilot's office wasn't neglected. As well as plastic strip and Albion Alloys tubing, I also added a WMIK thingamajig and some Airscale photo etch bits.
Now time for paint, first up, Alclad black primer. This is highly recommended owing to all the different materials, plus it will help with shading.
Next up I sprayed a mix of Tamiya Black, Buff and Light Aircraft Grey, I wanted a worn metal tone. This was then promptly sprayed with a coat of Ammo of Mig's Scratch Effect chipping fluid. This chipping method is by far and away my favourite, more details in a bit.
The base coat is predominantly Tamiya XF-4 Yellow Green, in other words a zinc chromate colour. The black areas were masked and sprayed.
Then the area was wetted before scrubbing with a brush. Eventually the water soaks through the paint and dissolves the chipping fluid, this then lefts off the dry paint creating highly realistic chips.
Now for the detail painting. A very fine brush was used, plus some nerves of steel! I found the CB panel tricky, I resorted to a "wet" dry-brush! In other words, just wiped off a bit of the paint before very carefully stroking the raised detail. This gives a much more opaque and strong effect, plus it doesn't distress raised areas and corners, not what is required.
Next up, pin wash. I used various tones of Ammo of Mig here, mixing a neutral grey/brown tone. I also experimented with a brand new product, I can't say anything here as it's still a prototype but it's awesome. As soon as I get the nod you'll know all about it here!
Next up Airscale placards to dress up the panels. I lost count after 70 or so! Most of them are tiny individual decals........
But I think you'll agree, they really liven things up in there.
Almost there! Next up it was time to dish the dirt, literally! Ammo of Mig's Airfield Dust and Earth pigments were applied on the floor and in the nooks and crannies. They were fixed with their own brand thinner. I didn't feel the need for pigment fixer as it wouldn't be handled.
You can see here I added some wiring bundles, again inspired by the real thing. They're not painted, I used cotton covered wire (available from Littlecars.com).
Ammo of Mig's Engine Oil was applied sparingly on that tank thing in the deep recesses at the bottom.
This is the pilot's seat and frame for the gunner. The seat was detailed up with all sorts of scrap and Albion Alloys tubing (I'm getting through tonnes of this stuff)! This paint is by far the best on the market, Mr. Paint, think Alclad but coloured!
Ammo of Mig's new acrylic paint was used to brush paint various details. its superb stuff, it sprays nicely too!
The seat harnesses are from the HGW He-111 set! Much more appropriate I thought.
It was painted with Tamiya paint. There's no wash, just a dry brush with Vallejo flesh for a worn and distressed look. The grey strips is decal from a 1:72 F-4 walkway decal, its supposed to be gaffer tape covering up the worst of the rips!
The finished pilot seat. That had some Airscale decals too!
I guess this does what it says on the tin. But there's a mix of the kit decal and yep, you guessed it, Airscale!
And here is the finished cockpit, apart from the tops of the throttle levers. this will be white glue but there's a lot of wet sanding to come so I'll wait.
That front coaming was too wide. I ended up chopping it in the middle and re-gluing it together!


No comments:
Post a Comment