Weathering: This is a subject close to my heart, in fact it's why I make models. A poster on the last entry pointed out that the Junkers 88 model was over weathered as there is a picture of this aeroplane in the Airdoc publication. And yes, I totally agree; if I was making a model of this aircraft at the time the photo was taken. I like to use artistic license here, I will model a particular subject but I will use photos of other aircraft in the same or similar units at different stages of their careers as inspiration. My model will be of a specific aeroplane but not at the time of the photo. If I were to, then I would have to get every last spot, stain, paint chip etc exactly the same as the photo. In other words; impossible. My aim of doing that particular aeroplane would be to represent what that aircraft would look like in a couple of months later using other photos of similarly weathered aeroplanes in order to get the weathering as close as possible.
Now for the next project; Academy's superb F-4B Phantom II in 1:48. This model will be featured in a forthcoming AK Interactive Weathering Magazine issue. To that end, in order to be fair to AK Interactive I will not be showing any painting or weathering techniques here, you'll have to wait for that issue but what I will be showing in detail, is the construction of the model.
Here is a list of all the after market products I will be using;
Aires Cockpit set
Aires open avionics bays
Eduard interior
Eduard exterior
Eduard intake blanks
Eduard Brassin seats
Eduard fabric belts
Eduard Brassin Aim-9B sidewinders (not pictured)
Eduard Brassin Mk 82 bombs (not pictured)
Mk 1 design exhausts
Airwaves or HGW RBF tags
CAM Decals (not pictured)
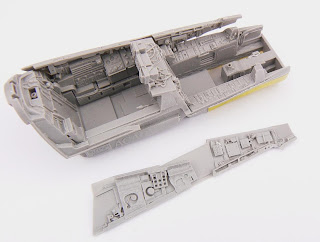
So work begins. There's a lot of cutting and fettling to be done in order to open up the nose panels. They extend into the lower fuselage part which was a bit awkward!
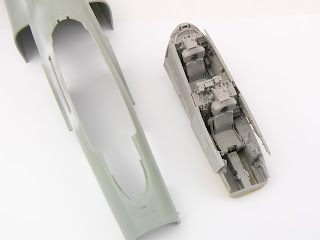
Now for the cockpit, good innit! The detail is spectacular and will benefit from careful painting. I'm still not sure weather to use the Eduard consoles, I did that with the F-100 and it worked well but I may just have a go at painting them. I'll have a think.....
There is a significant amount of plastic which needs to be removed in order for the resin to fit. I wish they would make them so they would just drop into place!
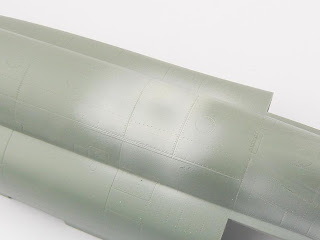
Talking of getting things to fit, the AAR bay is a resin insert. Its not too bad but will need filler and thinning on the inside.
On the spine there is an optional part so the USAF AAR panel can be used. I believe the C model is out in the next month or so.
So, quite a bit of extra effort to get the detail sorted but it will be worth it. A word of advice though, resin is nasty stuff so I always sand it wet so I get a paste not airborne dust particles. Its also much easier to clean up that way. Normally I don't really enjoy the construction phase but this time it's actually rather good fun!
Here's a sneak preview of the Corsair. Work has paused for the time being while I wait for some resin from Roy Sutherland's BarracudaCast arm of his company. The wings are done, as is the undercarriage and a little prep work has been done in the office.
And this will round off this blog entry. I asked a straight forward question on Hyperscale about cockpit colours and what followed was a grown up, respectful discussion. Each poster put forward his point of view, sometimes with some excellent photos, and everybody who contributed did so in a calm and mature way. Gentlemen, that's how a discussion forum should be used.
So until next time, happy modelling.
Jamie


No comments:
Post a Comment