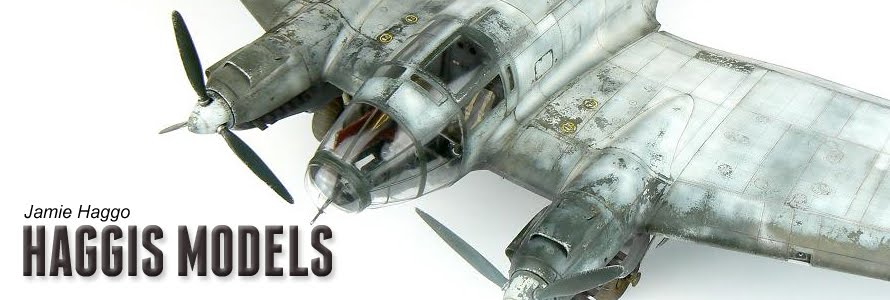
I have a modelling project coming up which I am very excited about starting although I do have a couple of other models to finish first, but more of those in a moment. An idea entered my head recently when I was looking at an old model I wanted to revamp. I had built a Tamiya Gekko years ago and tried the salt chipping technique, to say it looked awful was an understatement so the other week I stripped all the paint off, tidied up a few areas and broke out the RB Productions etched rivet tool. For those who haven't seen these I can heartily recommend them as they are cheap, easy to use, and give a fantastic result.
Anyway, my idea was to do an abandoned aircraft, one that had been discovered years later in a dilapidated state and this model would serve as a great canvass to try out the techniques.
Essentially, the technique involves layers and layers of paint chipped with hairspray. The sequence went like this:
Alclad grey primer
Alclad aluminium
Vallejio matt varnish
AK Interactive worn effects chipping fluid (hairspray would work if you couldn't get the AKI stuff)
Tamiya sky grey - chip with a brush and water
Vallejo matt varnish
AK Interactive worn effects chipping fluid
Custom mix of Tamiya hull red, yellow green, white, buff - chip with a brush and water
Vallejo matt varnish
AK Interactive worn effects chipping fluid
Custom mix of Tamiya IJA green, buff , yellow green, white - chip with a brush and water
Vallejo matt varnish
AK Interactive worn effects chipping fluid
Spray the markings, faded red and yellow - chip with a brush and water
Seal the whole lot with Vallejo matt varnish
As you can appreciate, there's a lot going on but the key is thin layers to preserve the delicate surface detail and to make the chipping easy and effective.
With the base coat done it's onto the filters, oils, washes and pigments. All these effects mean a layered approach for an overall effect, each adds there own layer which contributes to the overall effect.
I think this technique needs some work and tweaking but overall I'm very happy with it. I can't wait to finish off the projects in the pile so I can start the proper project, this will be set on a small vignette with some ground work which will be fun.
Talking of other projects here's the latest finished model. It's the Hasegawa Fw 190D-9 with Quickboost resin exhausts, RB Productions seat harness and MDC cockpit. This model is a commission but I wanted to do a large scale model with just a few simple accessories hence the lack of photo etch, scratch building and riveting on the airframe. You'll note that the exhausts aren't on the model, that's because at the time they hadn't arrived from the customer (in fact as I write this they still haven't arrived so I've ordered them myself to get the project finished, I've got another one in the stash anyway).
Now for the armour. I am building 2 Dragon StuG IIIG kits with a pile of Voyager photo etch, barrels etc. The difference is one is in 1:72 and the other 1:35. This approach will be quite fun, I'm aiming to do the same vehicle but at slightly different times in it's life (my excuse for not getting things exactly the same). I've just started to paint the smaller model which will be a test, the chipping is driving me nuts, but it will hopefully look good in the end.
I'm building these for Geoff Coughlin's internet magazine Scale Modelling Now. It's a great resource and he's running a special subscription offer at the moment so it's well worth checking out.
Before I sign off I just want to let you in on an exciting project. I'm going to be writing a book with my mate Jay Laverty. We both have a passion for weathering model aircraft and are keen to get something more substantial published, we're only at the preliminary stages but things should be coming together quite soon. I'll announce it officially once everything is in place.
So, until the next time, happy modelling.


