Welcome to part 7, the final part. I finished the model this afternoon and in
away I’m sorry as I have thoroughly enjoyed not only the model itself but the
blog aspect. This is something new as
normally I just put up snippets of news, my own ramblings and pictures of my
completed models. Most of my models are
for publication and editors will get quite grumpy if the whole article is up on
display months before the magazine is out however, not all my models are for
articles and as such when I get the opportunity I will do this again.
Actually, all that blah is a bit precipitant,
I have some more stages of finishing before I get to the completed pictures.
Propeller
The prop is a multi part affair, there
is a spinner on the sprue but many Kates didn’t have one fitted, I liked the
look and the detail is good so I went as per the instructions and left it off.
There are decals included however I
decided to mask and spray them.


More
chipping
I wanted to spray the wing walkways
however I was worried about the tape lifting off the top coat, that’s a
function of the Worn Effects fluid, that’s why I left it until now.
Rather than using the hairspray
technique again I used the sponge/Maskol technique. The Maskol is dabbed on with a fine sponge.

Then the walkways are sprayed, in this
case Tamiya Neutral Gray darkened with Black.


Wheels
The hubs had been sprayed with Vallejo
Steel and then masked with the Montex set.
In order to poke the cocktail stick through, slits were cut in the centre
of the vinyl circle.
P1180066

The tyre colour is a mix of Tamiya
Matt Black, Neutral Grey and dark Earth; this gives a nice authentic rubber
shade.

Now for the fun part. I wanted my Kate to be quite dusty not unlike
the reference photo so that meant I had to do the wheels as well. For this you’ll need a selection of pigments,
brushes and white spirit.
P1180080

With a smallish brush, add the dry
pigment. I like to scrub it into the
paint so a matt finish is vital.

With a different brush, white spirit
is added to blend and fix the pigment.
Allow the mixture to pool in the recessed details rather like a wash.

When dry, take the original dry brush
and work the pigment, further blending it to a desirable finish. If you get tide marks, add a bit more dry
pigment, you can also use your finger to blend it even further but beware what
you touch afterwards!

To add a bit of variety, I take a tiny
amount of different pigment, in this case a darker tone.

Again, work it into the surface.

Here’s the finished wheel. Remember I was after a dusty finish not a mud
bath!


If the wheels are dusty then that
would apply to various parts of the airframe as well, in this case the wheel
wells. The same technique was used here
but again, remember to be subtle.

Machine
gun
Now for some detailing. The machine gun is quite nice but it can be
improved somewhat using scratch built detail and the photo etch set. Note the trigger, It’s 1:48 remember so it is
tiny! In addition, the barrel was
drilled out as it comes solid, no slide mould technology here!

It was painted with a darker mix than
the tyres but still not neat matt black.
Then it was dry brushed using AK Interactive Steel pigments. The pistol grip and the handle were painted
with Vallejo Flesh before being streaked with thin Burnt Umber oil paint for a
wood finish.

Towing
arm
The towing arm was sprayed with Tamiya
Yellow, I have no idea if this is authentic as I couldn’t find any photos of
the internet but I thought it provided another bright splash of colour and
would help it to stand out. It was
chipped using Vallejo 70822 German Camo Black/Brown using the sponge technique. It then had a wash with Abteilung Shadow
Brown oil paint before being set aside to dry.

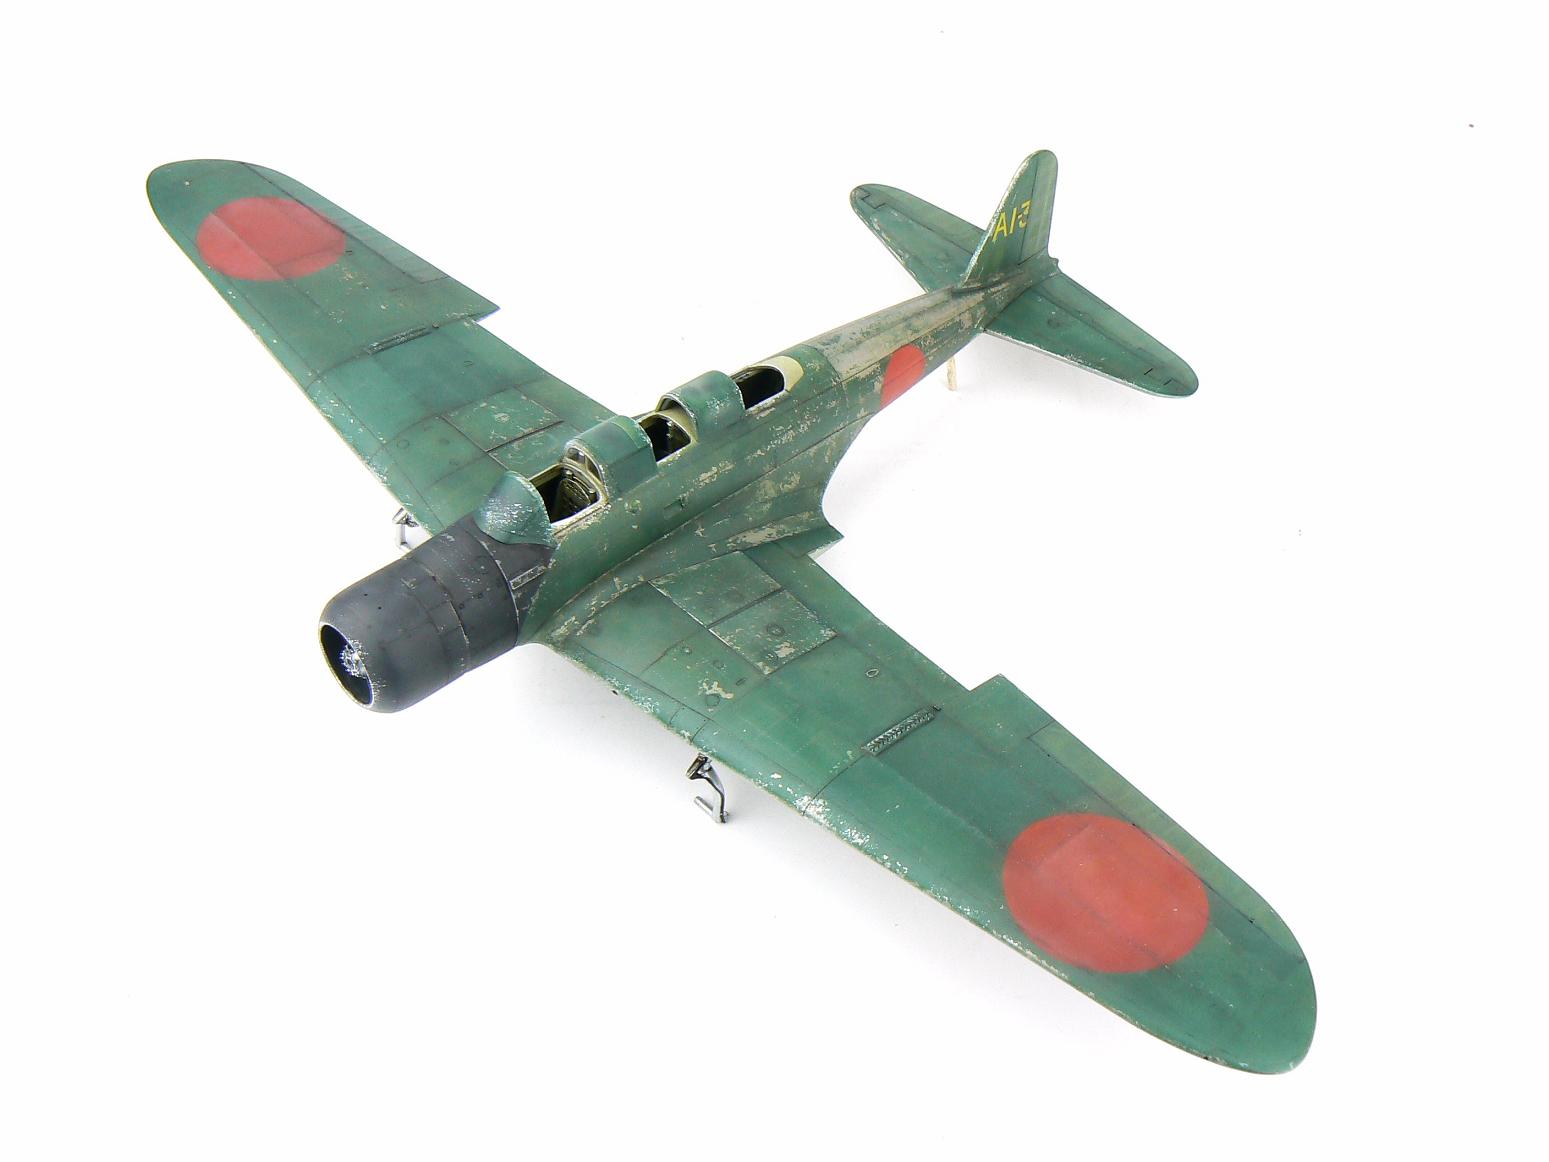
Airframe
Dusting
In keeping with the dusty theme, I
needed to create dust effects on the airframe itself. Using the same set of pigments, they were
applied sparingly with a dry brush and worked into the surface. The dark green of the camouflage gives a nice
contrast to the dust. When doing this,
try to apply the pigments logically, to that end I concentrated on the wing
roots and around the fuel filler areas.

When the initial application was on, a
larger soft brush was used to blend the pigments. Note I haven’t used any white spirit to fix
them as I didn’t want to interfere with the oil paints as they wouldn’t be
fully dry yet. At the end I will spray
AK Interactive pigment fixer over the top and this will set them permanently.

And here is the finished result. I am still toying with the idea of doing fuel
stain by the filler caps but I don’t want to spoil the effect I have already
achieved. I will mull it over.

Summary
And that my friends is that
really. Just a few finishing touches and
she was all done. As I said in my
preamble, I have thoroughly enjoyed bringing you this project. I have learnt things along the way and I hope
I have managed to pass on some of my weathering techniques to you all. Weathering aircraft is a real passion of mine
and I am always seeking to develop techniques and ways to use the various
products on offer for an authentic result.
Thank you for all you messages and support, it has been really
encouraging and the it rate on the blog has just blown me away.
My next project is yet another Eduard
1:72 Bf 110, in fact I have 3 to do! Two
are commissions, one straight from the box and one using some extra bits and
pieces. However the third is all
mine. That’s going to have battle
damage, open engine cowlings, rivets and a well worn winter white wash! I can’t wait to break out the Worn Effects
jar again. I will be doing that ship but I have to get these commissions done as I have my Instrument Rating Examiner upgrade at work coming up and that is a lot of work so I need to get the 110's done first.
So until the next time, take care and
happy modelling.
Jamie